This article will go over using the Markup Tool to create Activity Markup Maps.
Accessing Activity Markup Tool
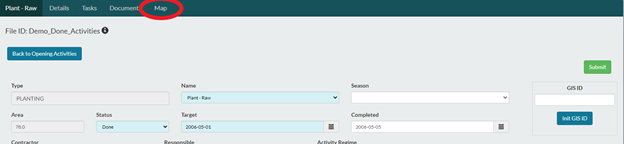
- The Markup Interface is available through Opening, Activities. Then you would select the Activity you wish to make a Mark Up Map for.
- The Activity does not need to have its own Positive Spatial Connection.
- If your Activity does not have a Positive Spatial Connection you will can either use GPS Data loaded into the GPS Spatial Storage or other Positive Spatial Connections, such as Opening, Standard Units or Forest Cover.
- When you click on the Map Tab you will be presented with the Mapping Interface.
- Please see Mapping Tools – Icon Overview for further details
Markup Icon
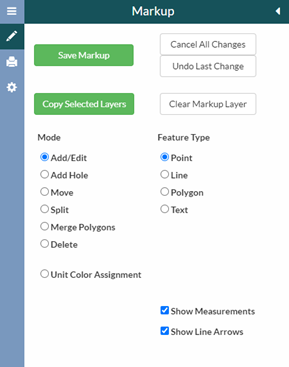
- Markup Icon is where you can create a markup map for the Activity you are working on.
- Here you will be able to manipulate your Current Positive Spatial Connection to facilitate in making Activity Mark Up Maps
- Markup Modes:
- Add/Edit – You will be able to add or edit Features when you have this Mode selected.
- Add Hole – This Mode will create a Hole (net out) within a polygon
- Move – This Mode will allow you to move a selected Feature
- Split – You will be able to Split a Polygon or Line with this Mode.
- Merge Polygons – Allows you to merge multiple polygons together.
- Delete – Allows you to delete your Features.
Markup - Getting Started
- To create an Activity Markup map you will first start by Copying a Positive Spatial Connection to the Markup Layer
- You will first need to turn on the Positive Spatial Connection you wish to copy.
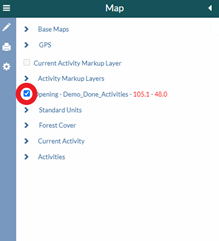
- When you have the Positive Spatial Connection turned on that you wish to Markup you will then go to the Markup Icon and select “Copy Selected Layers”, you should then select “Save Markup” this will save the copied Layer into the “Current Activity Markup Layer”
- Once you have your layer Copied over to the Markup Layer you can then proceed with editing your Markup Map.
- When you have selected the Mode and Feature you’d like to edit you can then follow the tool tips that appear when you hover over the map window.
- GPS Data can be used to help with creating Markup Maps, they can be either traced or used as is in the Markup Map. Please see Mapping Tools - GPS Data for further details
- You will first need to turn on the Positive Spatial Connection you wish to copy.
Markup – Planting and Survey Activities
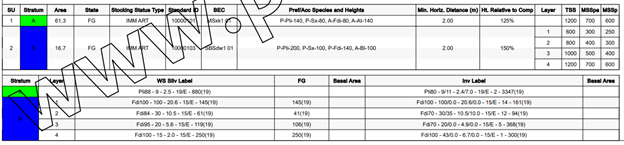
- Planting and Survey Activities differ from Other activities as you can split polygons and assign colors to the units. These will then correlate with the tables that can be output onto the Generated PDF
- Once you have the Polygon Split where you would like you then can assign the colors.
- In the menu select Unit Color Assignment
- Select the Unit & Color you want to assign to a feature
- Select the feature you want to assign the Unit/Color to (see tool tip when hovering)
Markup – Printer Icon 
- Before Generating PDF you should first set your printing settings
- Here you can customize your output settings for your PDF.
- All Activities can have Data Tables.
- Planting will output the following

- Survey will output the following
- All Other Activities will output the following

- Planting will output the following
- When all printer settings are set for your Markup Map you can then Hit the Generate PDF button

- See Article for Page Size Recommendations
Markup – Download KML
- Download KMLs from the Activity Markup Tool using the Generate KML button
- See Article Activity Markup Tool - Generate KML
Tips
- Hit Save Markup often
- Follow Tool Tips that appear when Edit Mode is selected this will appear when hoovering over the Mapping Window.